Monday, March 4, 2013

Upcycled to Wall Art


I love wall art, but I get bored with things too easily. I need change in the house every few months so i rearrange the house frequently but I need a change in decor too. Instead of buying things or switching out decor between rooms, I started upcycling paper towel or toilet paper rolls into new wall art. No money out of pocket and it looks great!


All you need is:

Paper Towel or Toilet Paper Rolls
Scissors
Glue Gun

Start by smashing your roll in half, so it flattens out. Then grab your scissors and cut into thin pieces. You're going to use a lot of rolls, so save up! Cutting them up, they'll look like little petals that we'll glue together to make flowers.


  Once you have plenty of rolls cut up, we can start gluing. Put a little dab of hot glue towards the bottom crease on one side of the "petal" and attach another piece to it at the same point. Keep going around until you have a small flower.


I kept some flowers like this, and made some larger and larger. All you need to do it grab 6 more "petals" and glue them in between the "petals" of your center flower.


You can make the flowers as big or small as you'd like. Once you have plenty of flowers made, arrange them and glue them all together. Once you've glued your arrangement together, you can spray paint them or just hang it up on the wall!


Now you have some new wall art that didn't cost a thing!


 Hope you enjoyed it and it inspires you to make some new things!

Glitzy Heels


If you're like me and you're obsessed with glitter, you're going to love this tutorial! I wanted to make some Texans heels so I could rock something girly while watching the game. Of course, they don't have to be football heels, but I'll explain how easy, although time consuming, it is to revamp an old pair of shoes or dress up some new ones.


What you need:
 
A Pair of Shoes
The best to use are either canvas shoes like vans/toms, patent leather shoes or the like. Using anything like suede or similar, won't work out too well.
Modge Podge (can be found at craft stores)
Fine Glitter
Paint Brush and/or Sponge brush
 
Make sure the outside of your shoes and the soles are clean. The first step is to decide what design you want on your shoes. Be creative! It can be anything you want. Mark your design on your shoes. I used a permanent marker, which thankfully was covered up by all the glitter!
 
Now for the messy part...get your modge podge and glitter out. Work with small areas at a time and paint on a thin layer of modge podge and dump on the glitter and shake off any excess. I always do this over plates so I can dump the excess glitter back into the containers.  Keep working around your shoes until both are done and let dry.
 
*It's going to be wet for a little while, so switch between shoes to keep from messing up what you just did*

Once your shoes are dry, get your sponge brush and modge podge out and coat the modge podge over all the glitter. The modge podge will act as a sealer so you don't have glitter falling off of your shoes. Let dry overnight. (Coating the glitter with modge podge will make the glitter a little more dull than what it originally looked like but it still comes out great!)
 
If you want the bottom of your heels glittered as well, do the same on the sole. Use a sponge brush or paint brush and coat a thin layer of modge podge all over the sole. Pour on the glitter and shake off the excess. Let dry and then paint modge podge over the glitter on your soles. Let dry at least over night to make sure they're good and dry.
 
Put those awesome shoes on and see how many compliments you get!


Get Your Greens On!


I'm pretty nutty about eating healthy, although I can't always get my daughter to eat as healthy as I would like. She's 22 months old and typically not too picky about her food...except when it comes to spinach. I'm obsessed with spinach. It's so full in vitamins and minerals, antioxidants, and a good source of fiber and with all of that; it gives you a great boost of energy. So, I clearly felt it necessary to find some way for her to get some more greens. And what better way to do that then put it in a smoothie! It took a few trials and errors until I put together a great recipe. I promise, you won't even taste the spinach.


I try to use everything organic I can. I know it's a bit more expensive but it doesn't have pesticides and typically more nutrient rich. I've found that the cost isn't too bad for everything you get out of it.

What you need:

Blender
Fresh Spinach
Banana or Apple (both cover up the spinach really well)
100% Fruit Juice
Vanilla Yougurt
Whole Milk


Now let's make a great smoothie! Wash your spinach and throw a few handfuls into the blender. Then peel and cut up your banana or apple. Add about 1/2 cup each of your juice and milk. Then throw in a few spoonfuls of yogurt. You can add ice if you want, the smoothies is already going to be pretty thick though. Blend it all up until everything is mixed well and enjoy your smoothie!

This smoothie will give a great boost of energy and you'll feel great all day long! If you have your own recipe for an energy boosting shake full of nutrients, share it below!
 

Sunday, March 3, 2013

Shorts, Shorts, Shorts


Again, another very easy tutorial. You're going to love it! The shorts are comfy and you can make them simple and fast for you and the kids.


For this shirt tutorial, click here

Materials needed:

1/2 yard of fabric
scraps for contrasting fabric (optional)
1" elastic
Pair of shorts for pattern

Like I've said before, I hate using patterns. For this tutorial, I grabbed a pair of shorts I liked the fit of and used those to make a pattern.

**The shorts in the picture above are the same pattern as this. I made the length a little longer instead of sewing on a cuff**

Now grab a pair of shorts you like the fit of and let's get started! 

Turn your shorts inside out and fold in half. With your fabric folded in half, trace out your shorts making sure to add enough room for seam allowances and adding a couple inches to the top for your elastic. Trace pattern out twice for the front and back.

If you want to add cuffs to your shorts, cut out 4 strips of fabric the same length as the leg of your shorts. 


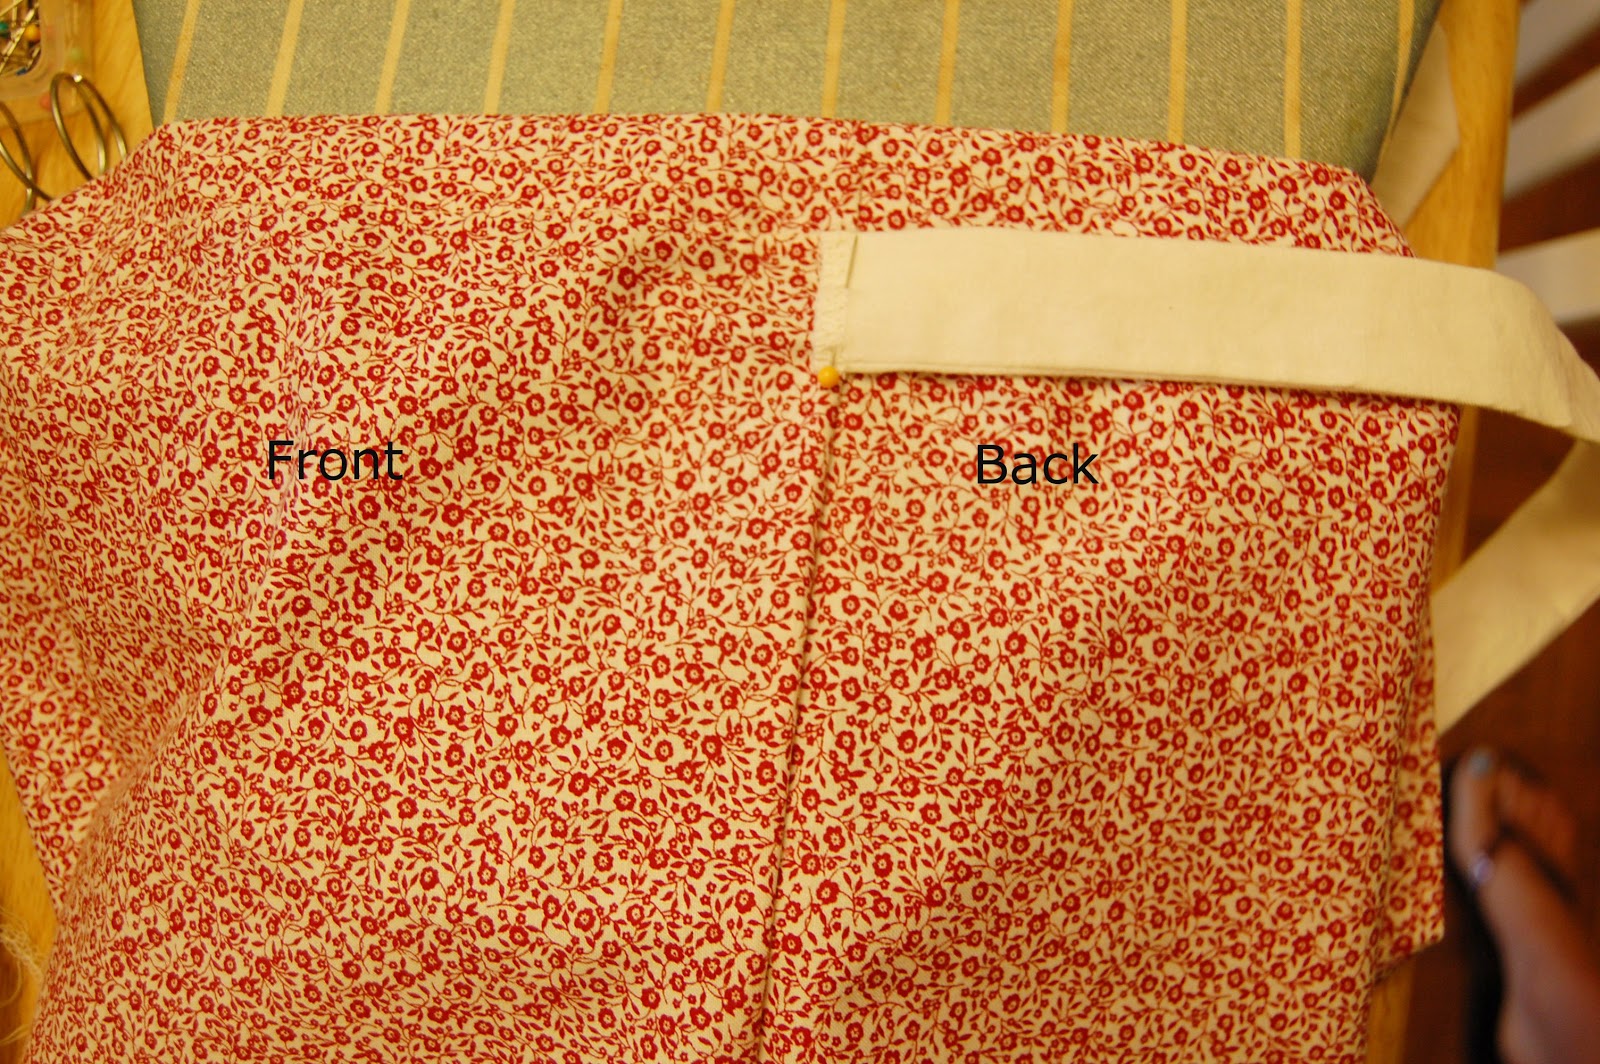
I wanted to put a tie at the top of my shorts. It looks cute and hides the elastic band. Cut 2 long strips about 3" wide. Long enough from the center of your hip (where your side seam is) to the middle front with room to tie. Fold in half with right sides together and stitch the edge and to the front of the tie. Press your seams and turn right side out.


If you're using cuffs, you want to sew those onto the bottom of your shorts first. With the wrong side of the cuff to the right side of the shorts, pin and serge/stitch. If you don't have a serger, use a zig-zag stich. Press your seams.


Pairing up front and back pieces, put right sides together and pin along the outer side seams and along the side seam underneath the crotch. Serge/stitch and press your seams.

Now you should have 2 tubes. This part gets a little bit tricky...Put right sides together, so turn one tube right side out and keep the other wrong side out. Then put the right side out piece inside the wrong side out piece. Match up your seams and pin along the crotch and serge/stitch. Turn the shorts wrong side out and press the seam.

 Turn your shorts right side out and press your cuff up 1/4" to have a clean hem. Then turn your cuff up, pin and top stitch.


If you're not using a cuff, just hem the bottom of your shorts. Turn inside out and turn over 1/4" and press and then another 1/4", press, pin and stitch.

Turn your shorts inside out. We're now going to make the casing at the top of your shorts for the elastic. Turn over 1/4" and press, then turn over again allowing enough room for your elastic to fit through. Pin and sew, leaving enough room to get your elastic in.


Before we put the elastic into the casing, we'll attach the ties. Turn your shorts right side out. Pin the ties on the center of the side seam with the right side of the ties pulled towards the back of your shorts. Pin and zig-zag stitch in place.


Measure out the elastic for waist or hips, wherever your shorts will sit and subtract 1". Hook a safety pin to one end of your elastic and push through your casing. Overlap the ends of your elastic enough to stitch together and finish stitching your casing down.


Your shorts are done! Pair with a cute shirt and rock 'em!


Flowy Shirt


You're going to love this tutorial! This is such a simple shirt to make and can go with so many things. Hope you enjoy!


Materials needed:

1 yard of soft, flowy fabric.
I always search the clearance fabric for this. You can get it for as low as $2/yard!

Lay out your yard of fabric, with the fold at the top. Mark the center top of your fabric on the fold. Measure how you want your neckline. I marked mine 4" on either side of the center mark and 2" down. Take into consideration your hemline. Cut your neck out.

Now measure how wide you want your sleeves. I marked mine 10" down from the shoulder.

Decide how wide you want your shirt. It's supposed to be flowy, so don't make it too tight! I did mine 2x my chest measurement. You can always put it over you and mark or pin where you want your seams.

Pin along your marks and cut off excess fabric.


A serger is the easiest things to use for this. If you don't have a serger, use a zig-zag stitch for your seams. Sew your shirt up on the seams, and press.

Try your shirt on and see how long you want it. Cut off the excess.

Turn your shirt inside out and either use a rolled hem on your serger or you can hem by folding over 1/4", press and turn over again 1/4", press, pin and stitch. Hem the bottom of your shirt, your sleeves and neckline.
 
Try on your new shirt and make any adjustments needed.
 
Now you can rock your new flowy shirt!