Thursday, May 30, 2013

Twisted Bandeau Bikini


It's now "unofficially" Summer! Even though my "bikini body" might not be in tip top shape, it's time to make some swimsuits! For Memorial Day weekend, we got to go up to Hot Springs, Arkansas and hang out with the family on the lake. If you have never been there, it's a must! Everything up there is so beautiful, the people are so nice and you'll never want to leave. While we were up there, our big love bug (my step-daughter) showed me this swimsuit top she liked. It was a twisted bandeau top, one side with a pattern and one side a solid color....it was $30 just for the top!!!! She said "it's ONLY $30!" If you don't know by now, I'm insanely fruggle! I don't pay $30 for ANYTHING. Especially a swimsuit top. So, I told her instead of buying it I'll make one and go even further and make her an entire swimsuit for under $10...then I had to make myself one. Not to brag, but they came out pretty awesome!


Materials:

1 1/2- 2 yards of Nylon Fabric (It's on sale right now at Hancock's! 40% OFF)
1/2 yard of Swimsuit Linning (on sale too!)
Corresponding Thread


First we'll start with the top. You need to take your bust measurement and make sure it's not too tight! You're going to make two strips of fabric to make the bandeau top. With your bust measurement, subtract 3 inches and that's how long each strip will be. To get the width, measure from where you want your swimsuit top to start on top to where you want it to end under your bust and double that measurement. Once your two long strips are cutout, fold in half lengthwise with right sides together, pin, zigzag stitch or serge, press your seams and turn right-side out.


 Now that you have two long strips, lay one out flat and fold it in half end to end. Take your other strip and pinch the center and lay it inside the fold of your other strip, going top to bottom.


Then take the ends of each strip and pull them out to their corresponding sides. 


The easiest way I found to hem the back of your swimsuit is first to zigzag stitch or serge each end closed (on mine, the black side closed then the stripped side closed) then put right sides of your swimsuit top together and serge or zigzag stitch your seam closed and press.


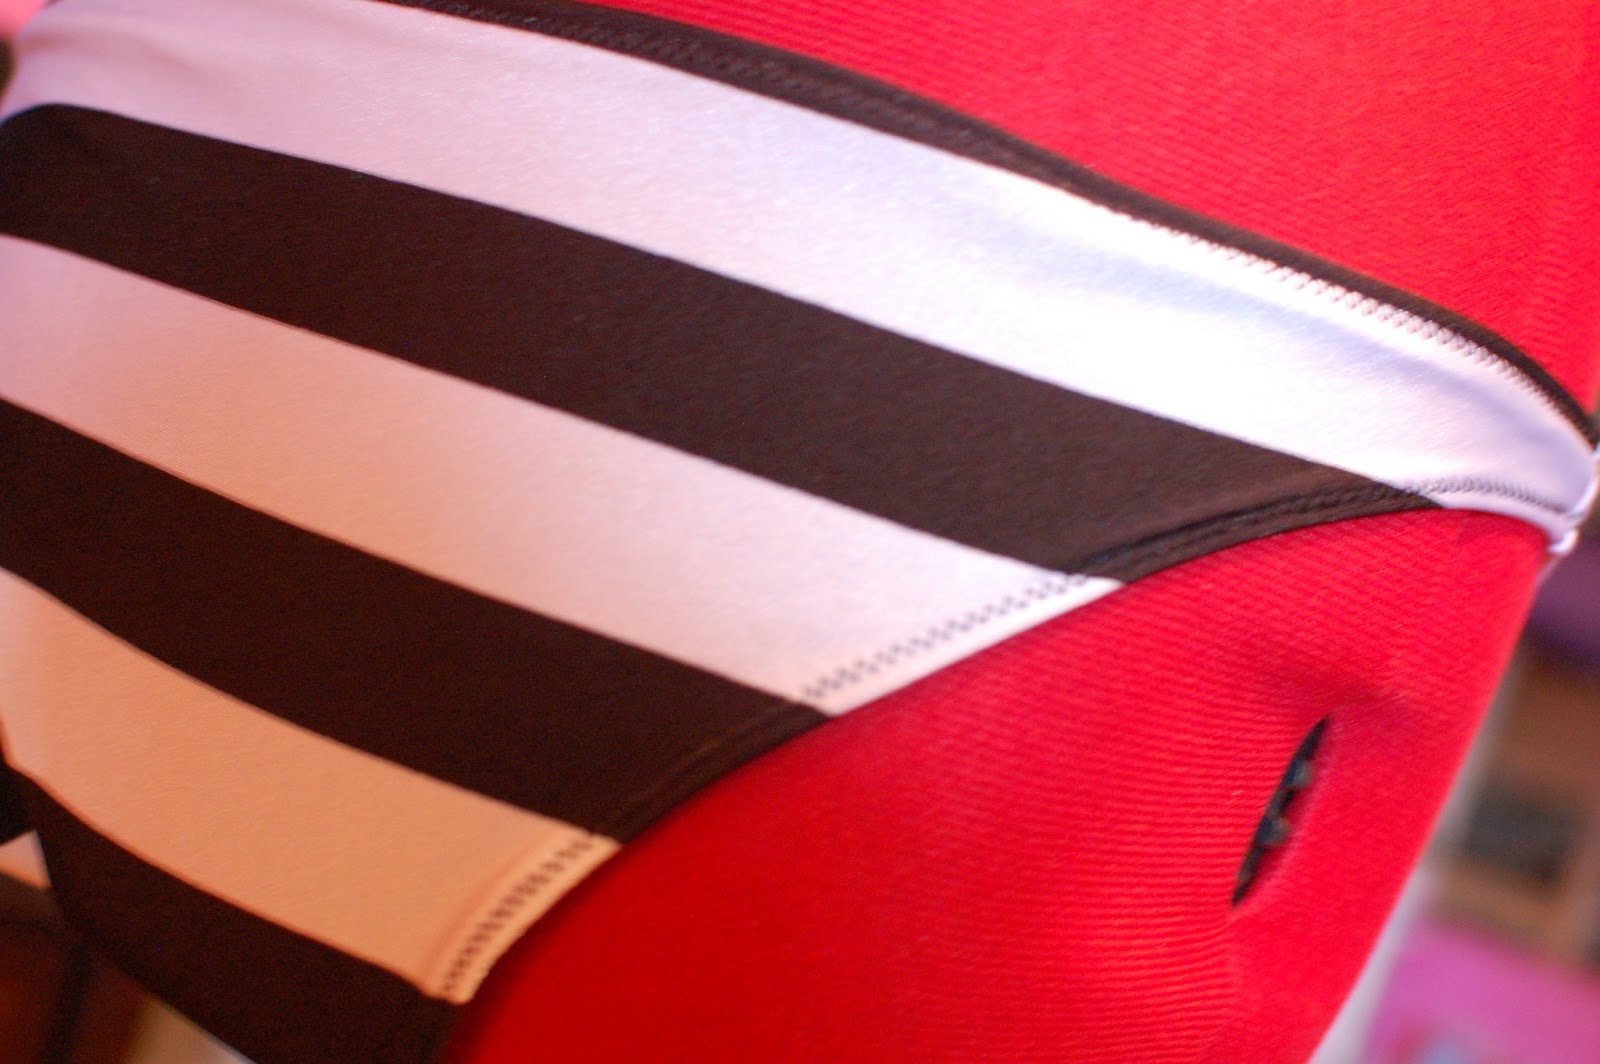
To make your swimsuit bottoms, find some bottoms you like and make a pattern from them. Make sure you make the crotch seams the same length on front and back! I made a mistake with that and had to add more fabric to make the seam correct. And make sure you leave room for seam allowance. Cut out your swimsuit fabric and your lining fabric.

To sew your bottoms together, sew the side seams and crotch on your swimsuit fabric and lining fabric with right sides together. To attach your lining to your swimsuit fabric, have your swimsuit fabric right-side out and your lining inside out. Slip your lining into your swimsuit bottoms, matching up your side seams and crotch seams. Pin along all sides so the lining and swimsuit bottoms will be pinned together. Then zigzag stitch or serge together.


Now that the swimsuit bottom and lining are together, turn it inside out and press over for your hem, pin then zigzag stitch closed.

Bam! Bam! Shazam! You've got a cute new swimsuit for a fraction of the cost you would buy one of these for! Hope you enjoyed this week's tutorial. Feel free to share and follow me on Pinterest where I post all the blogs @ www.pinterest.com/makeitlovediy


Friday, May 17, 2013

Sweet Spring


This week, we're making an entire outfit! A loose polyester tank, a bandeau top and a "skater" skirt. I haven't been able to wear anything (out in public) that shows my belly since I had the sweet baby. Stretch marks galore! I want to participate in this bandeau with a sheer flowy top trend, so I had to make a high-waisted skirt to do so...and this was the outcome...


If you shop for your fabric right, you can find some great deals. I don't like making clothes for the same price I can buy them for. It makes all the time completely pointless, so I always buy sale fabrics or take coupons in. I ended up spending $10 for this outfit. Including the fabric for the top, bandeau, skirt and zipper. For the top, I used Hancock's "value fabric" polyester. Only $4.95/yard! I only bought 1/2 yard, but next time will get a yard. The bandeau top, I used a stretch lace. And for the skirt, I found some amazing cotton floral fabric at 40% off! I'm a huge bargain shopper, but I have never been able to go buy 3 pieces for only $10 so I was super excited to make this outfit.

First we'll start with the top:

Materials

1/2-1 yard of loose fabric
Double fold biased tape (optional)


To make the pattern for your shirt, find a shirt you like the fit of but make sure it's loose and has a wide enough neckline that it will fit over your head without stretching. Turn it inside out and mark your pattern, leaving room for seam allowance. Cut your pieces out. Cutout a 4x4 piece of the fabric that we'll use for the pocket on the chest.

Once cutout, put your shirt with right-sides together and zig-zag stitch or serge your side seams and shoulder seams then press. Now you can either use double fold biased tape for your hem or fold over your hem 1/4" and press then another 1/4" and press, pin and stitch. (I've learned that if you serge the edges or put a zig-zag stitch around your edges, it will help with hemming them. It gives the fabric a little more weight and helps you keep an even hem.)


Now to just add your pocket. With your 4x4 square, either hem the edges or use your biased tape. Put your shirt on and mark where you want your pocket. Pin your pocket down and don't forget to leave the top open! I really wish I would have just used my poly fabric for the pocket. I think the print is a little too much with the outfit. Anyways, done with a simple little top!


Now to the Bandeau Top!

Materials

1/4 yard of fabric (something very stretchy)
1/4" elastic

Bandeau tops are so easy to make, that you want to but one again. First, take your chest measurement and subtract 5" from it. We're taking inches off so it will fit snug. Then measure from where you want your bandeau to start and down to where you want it to end and add seam allowance. (With the stretch lace, I didn't end up hemming the top and bottom.) Once cutout, put right sides together and sew up your side seams and press. Then sew down your hem. Now, get out your elastic. I cutoff enough elastic for the length of my top, but you won't need that much. Make sure your top is turned inside out and mark a straight line down the center front. Start sewing your elastic with a zigzag stitch if you're using something like lace, or a straight stitch. Pull the elastic pretty hard while your sewing it down to create the ruching. Once it's sewn down, cut the excess off. Sewing the elastic down will create a sweatheart neckline.


Then to the Skater Skirt. The skater skirt is really just a full skirt like a pleated skirt but without all the pleating. You need plenty of fabric for it since we'll be cutting it on a fold.

First you need to make your template for your waist which will be a half circle. Measure your waist then add seam allowance for your zipper. Then figure out the diameter of the circle by dividing your measurement by 3.14. Make your half circle like this:


Decide how long you want your skirt and add room for seem allowance then take 2" off that measurement so we can add a waistband. Lay your fabric out, folded in half like it comes off the bolt. From one end, measure up how long you wanted your skirt then pin down your half circle on the fold. Then mark on the other side of the circle down the length you want your skirt and mark from the center of your half circle down the length you want your skirt. Now connect your marks then cutout and cut your waist hole out so it will make large half circle like this:


Then cutout your waistband. I always cut waistbands on the fold so I have less sewing to do. If you don't have any more fold, just cut 2 strips out the length of your waist measurement plus seam allowance and sew right-sides together at the top and sides.


Lay your skirt out and cut straight down one side of your skirt. Then lay it out and attach your waistband with right sides together and sew then press. Once your waistband is sewn on, install your zipper according to manufacturer's instructions then finish sewing your seam together.

Lastly, all you need to do is hem your skirt and you're done with your outfit!

Hope you enjoyed the tutorial this week and thanks for checking it out! You can also follow me on Pinterest at www.pinterest.com/makeitlovediy